

False Front Drawer

Entry posted by jaxenro
1,627 views
This tutorial deals with converting a House of Miniatures drawer using thinner basswood for the front, sides, and bottom, and
dovetailing all four corners, to make a "false front" drawer. A false front drawer is one that has the drawer built as a open box
with all four sides and then the front piece is installed. This was done for two reasons:
1. Some woods, especially burls, are not strong on their own and need the reinforcement
2. Veneers allow the use of very thin layers of expensive and highly figured woords that are too scarce and expensive to make a
solid drawer from
Please refer to my tutorial "Dovetails for Drawers" for details and notes on creating the dovetails
I am demonstrating using the House of Miniatures Three Drawer Chest (Kit 40011) drawer using the kit parts as the drawer front and
as measuring patterns so you can convert any kit drawer for any House of Miniatures using these instructions
In the first part we are going to cut out the new parts using 1/16" basswood for the drawer sides and back and 1/32" basswood for
the drawer bottom
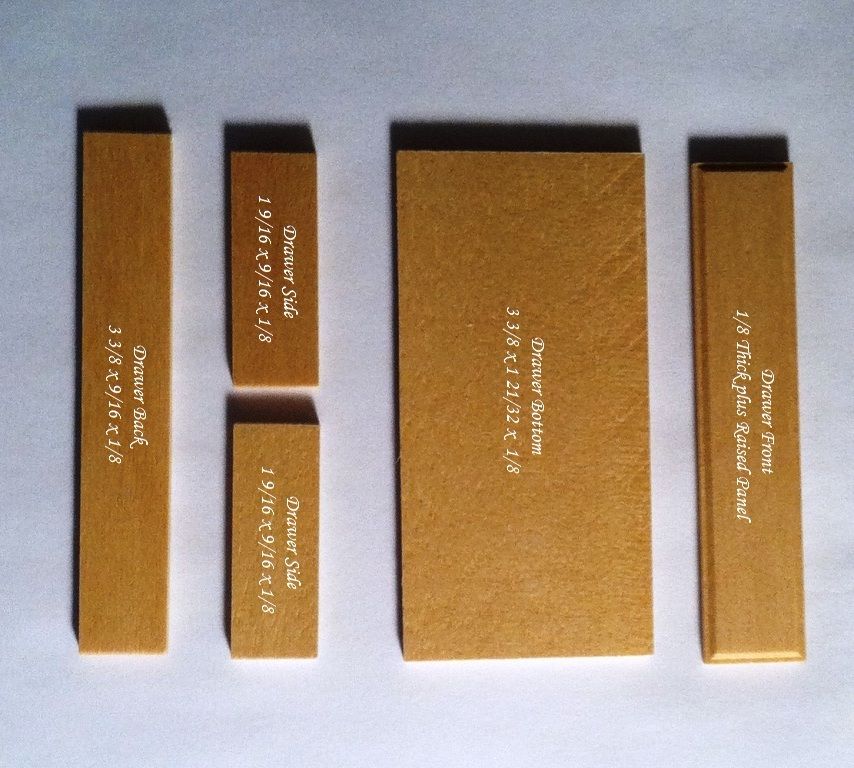
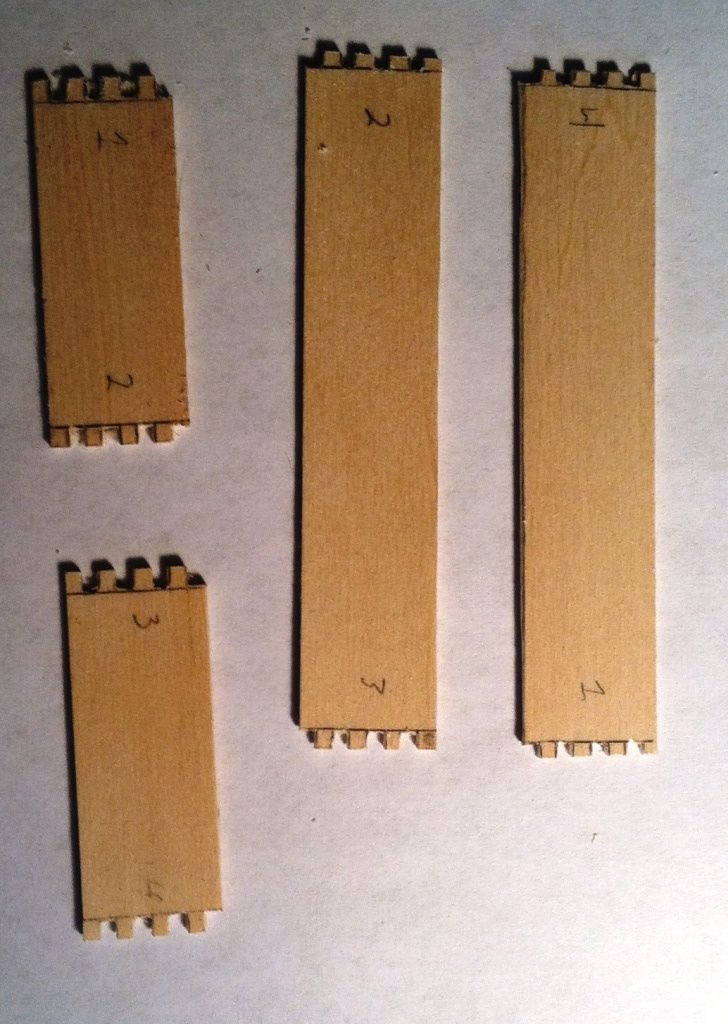
Step 1: Lay out and measure the kit parts. Here you can see the front, bottom, sides, and back. The kit uses a non prototypical
construction method where the bottom and back are the full width of the drawer and the sides rest on top of the bottom and do not
extend all the way to the back. This is something else we are going to correct
Photo 1 shows the parts and their sizes
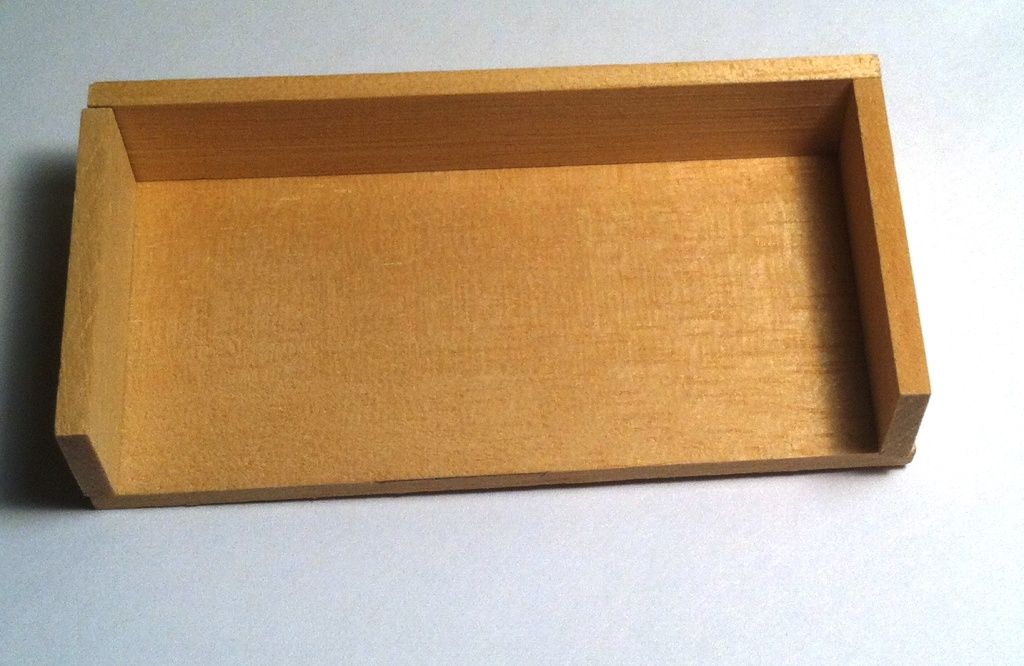
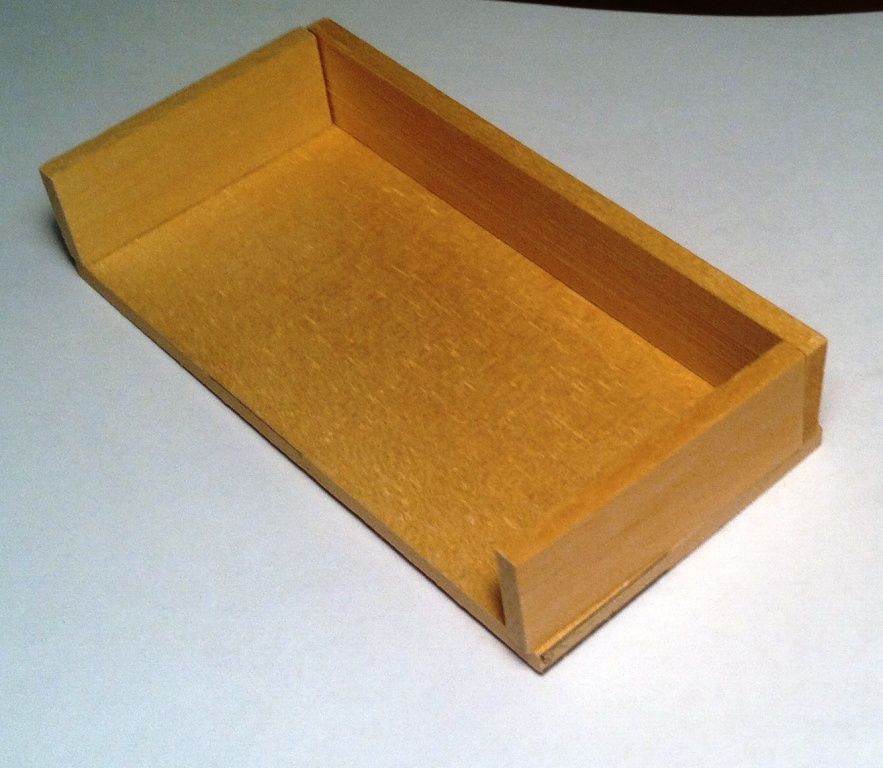
Photo's 2 & 3 shows how the sides, back, and bottom are assembled (they are just sort of propped up here)
Step 2: Cut out the new sides from 1/16" stock.
The sides are the full height of the old sides (9/16) plus the thickness of the bottom (1/8 or 2/16) or 9/16 + 2/16 = 11/16 high
The length is the full depth of the bottom (1 21/32) plus 1/8 (4/32) for the front plate, 1/32 for the front dovetail overhang,
and 1/32 for the rear dovetail overhang or 1 21/32 + 4/32 + 1/32 + 1/32 = 1 27/32 long
So the new sides are 1 27/32 x 11/16 x 1/16
Step 3: Cut out the new front and back from 1/16" stock.
The back is the full height of the old sides (9/16) plus the thickness of the bottom (1/8 or 2/16) or 9/16 + 2/16 = 11/16 high
The length is 3 3/8 (3 6/16) plus 1/32 per side overhang (1/16 total ) or 3 6/16 + 1/16 = 3 7/16 long
So the new back is 3 7/16 x 11/16 x 1/16
Step 4: The parts are marked for the dovetails (the four matching jions are lightly numbered 1 to 4 in pencil)
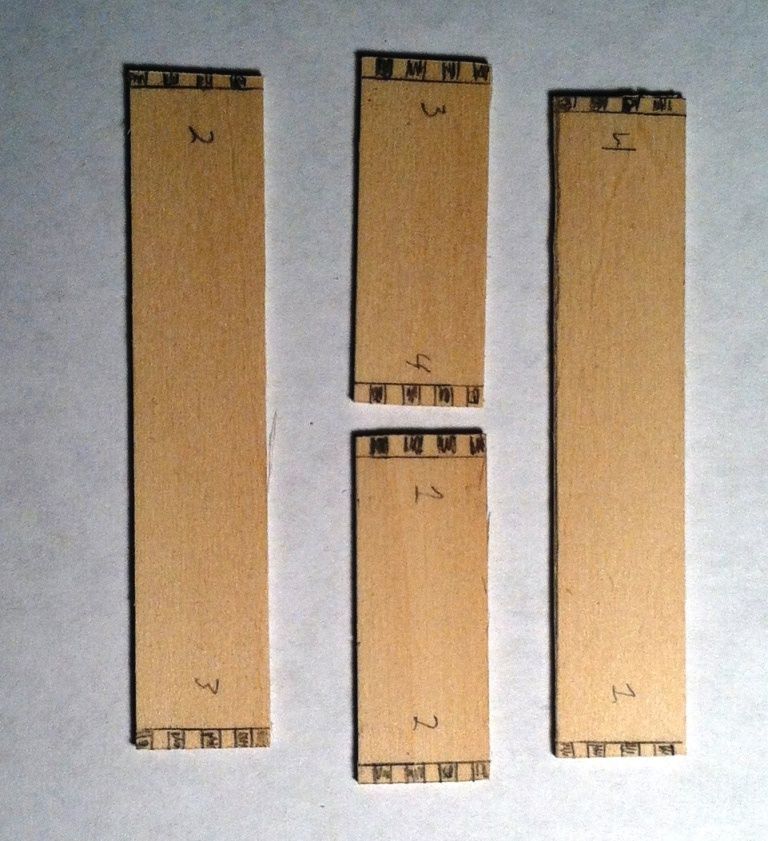
Step 4: Cut out the dovetails. As these are a little wider than 1/16" I found that an easy way to clean them up and "cut" the
dovetails for the front plate is to tightly wrap sandpaper around the edge of a scrap of 1/16" basswood
Step 5: Glue the parts together. I sand off the pencil marks just prior to gluing each side join. Sand off the projecting parts of the dovetails (see my dovetail tutorial)
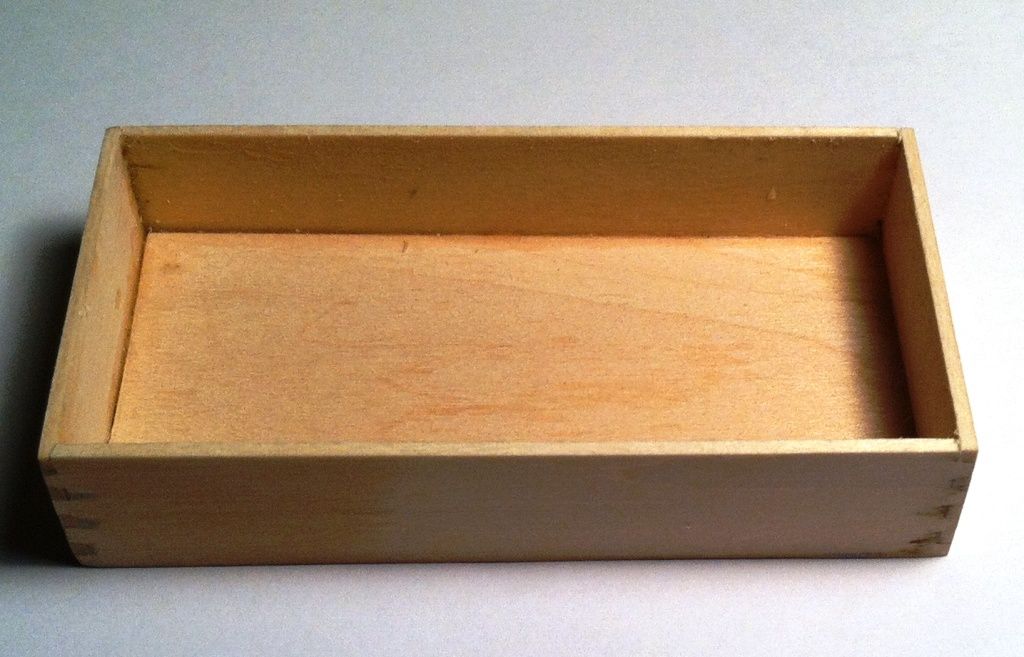
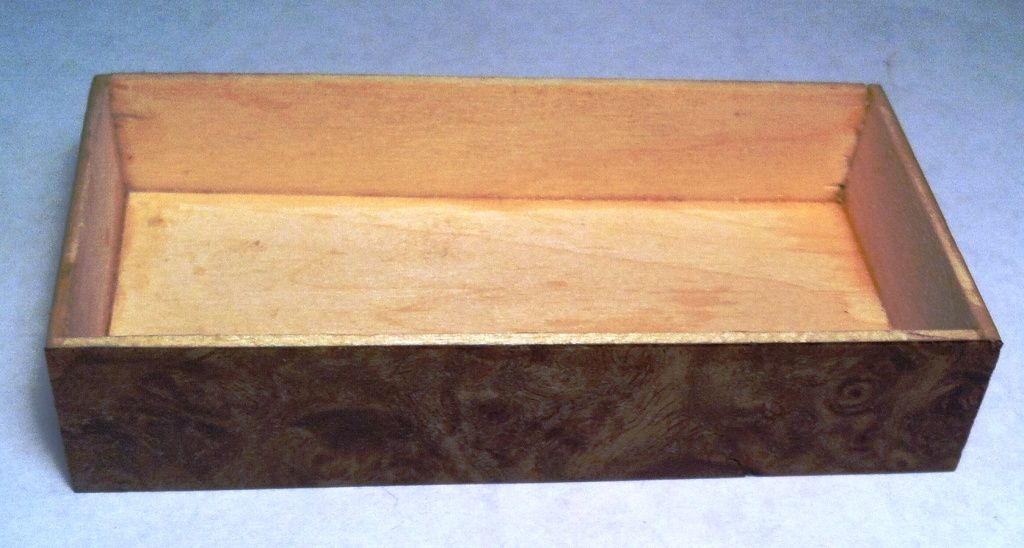
Step 6: Cut the bottom from 1/32 sheet and glue in. I found the easiest way is to put the completed drawer on the sheet and run a
pencil around the inside to mark the size to cut. I also use two scraps of 1/32 sheet to space the drawer bottom slightly up from
the base
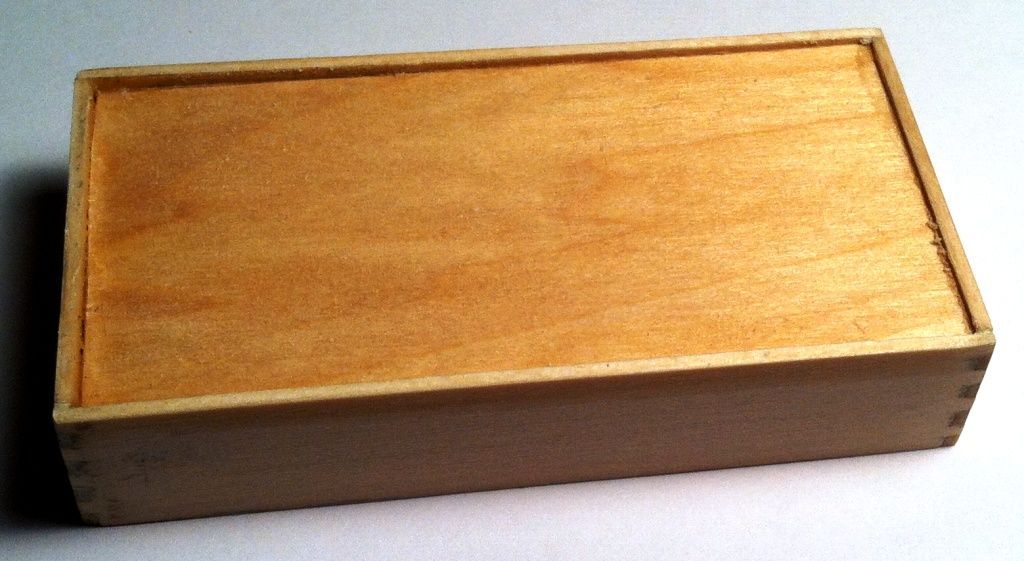
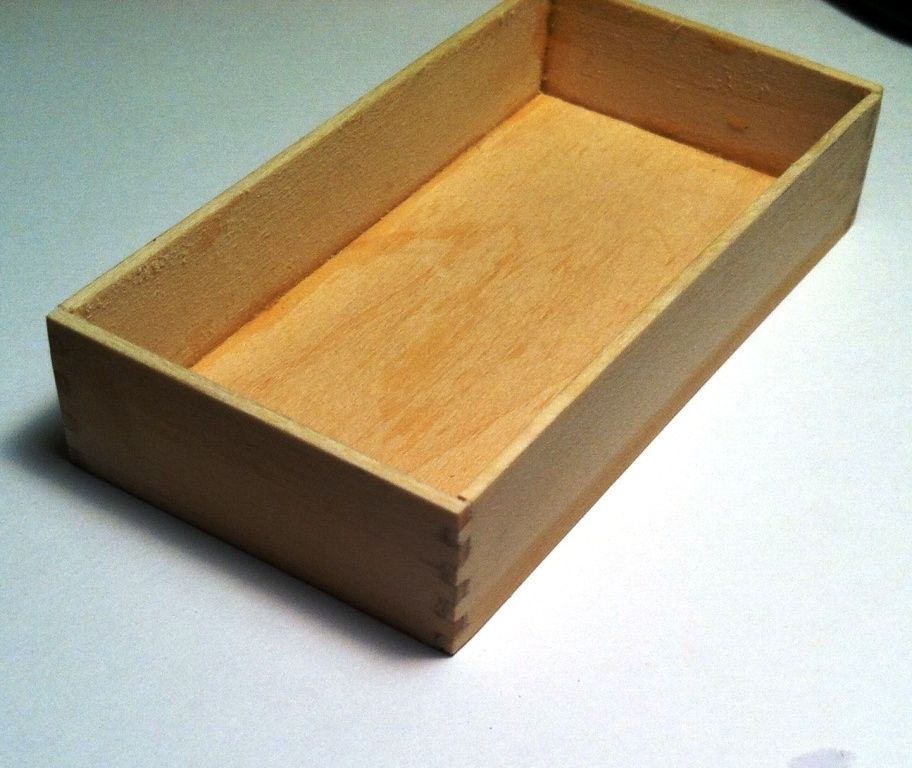
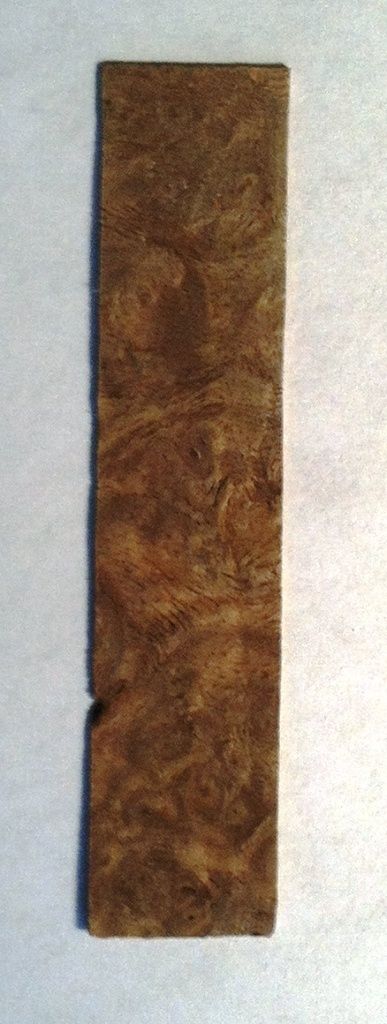
Step 7: Cut the false front from 1/42 veneer and sand flat. I found the easiest way is to put the completed drawer on the sheet
and run a pencil around the front plate to mark the size to cut
Step 8: Glue the false front to the front of the drawer. I use wax paper and a scrap of 1/16 basswood as a backing for the clamps.
Notice how the veneer slightly overhangs the drawer edge on all four sides
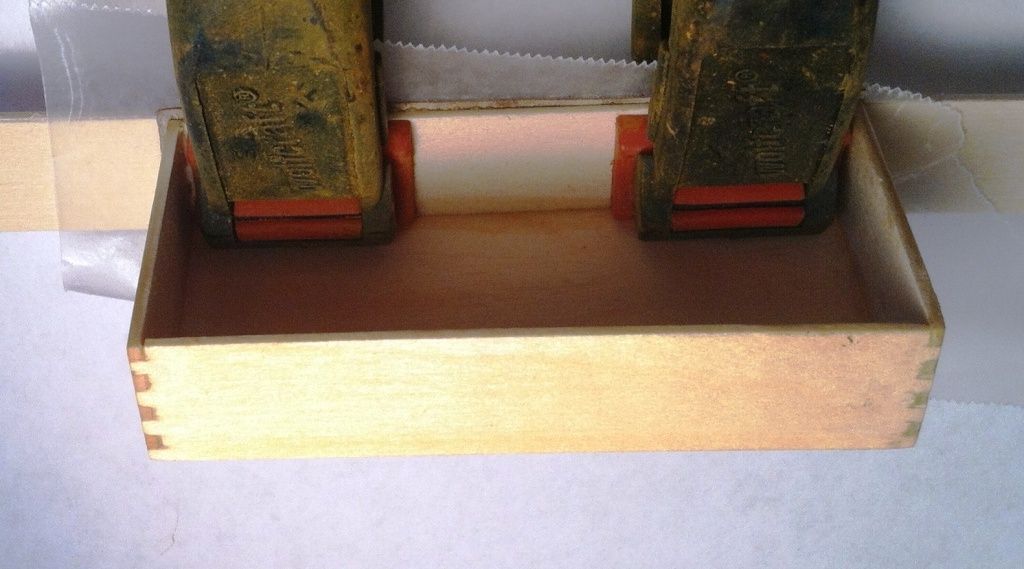
Step 9: I cut the plate slightly oversive and sand to fit after gluing
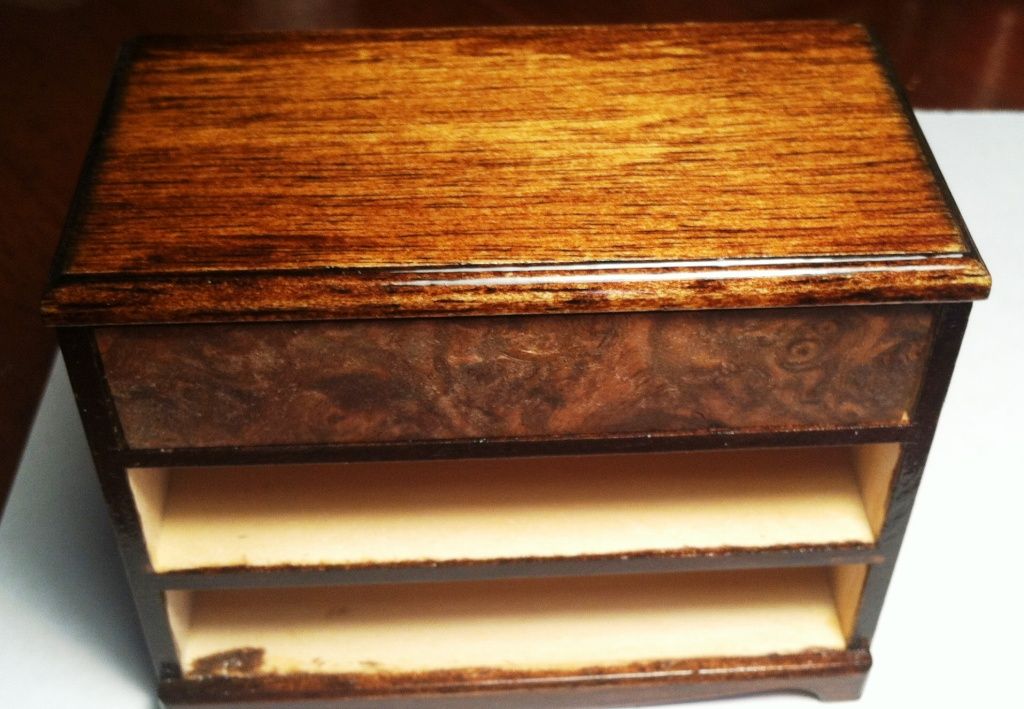
And here it is mocked up in the cabinet. I will cover the polyurethane finish and installing drawer pulls in another tutorial
-
 1
1

3 Comments
Recommended Comments